
A few months back, I threw handfuls of tulips upon the earth where my Oma laid to rest. She was buried with her late husband, my Opa. The earth in which their bodies now rest, was filled with rich colours of ochre and iron. Which of course, to a potter is always of curious interest. I promptly collected some clay in a bag, much to the amusement of my cousins.
Like the sentimental maker that I am, I wanted to take some of this earth home, explore its qualities & see if a memory of my Oma & Opa could be made. In this blog post I share how to process wild clay and what I created with it.
Ecclesiastes 12:6-7
"Life while it lasts, is soon over. Life as we know it, precious and beautiful, ends. The body us put back in the same ground it came from. The spirit returns to God, who first breathed it"
These pots a reminder of the earth that once held the lives of my Oma & Opa.
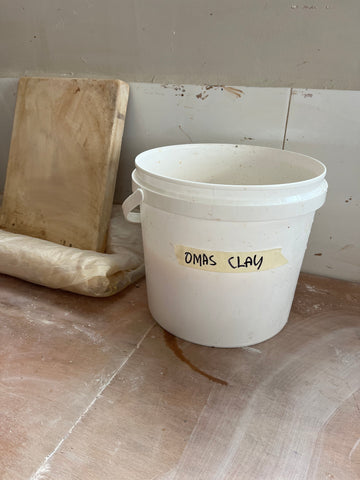
Processing Clay
I brought the clay home to my studio & laid it out to dry. It was full of roots & other debris so I had to dry it out in order to silt it down & clean the clay (let it to dry for approximately 2 weeks).
Once dry, I added water & silted it down into liquid form. This process helps the clay break down easily & enables me to remove any foreign debris like roots and other rocks that will affect the clays quality. Once the mud is entirely wet, I removed all rocks and roots or plant stuffs and left the mud to settle in the bucket.
After leaving the clay for a few days, I then remove any excess plant material that has floated to the top of the water. Pour the water of the top & leave the clay to dry a little further. Once the consistency is like thick melted chocolate, I then am ready to dry the clay out into a malleable form.
I then poured the clay onto my plaster batts & left it for an hours or so. The excess water in the clay will draw out much faster this way as the plaster wicks away moisture.


Once at the right consistency, I then scrape all the clay off each plaster batt, bring them together and wedge out any air bubbles that may be inside. Wedging is a process similar to kneading. Turning the clay and folding it into itself, smoothing out the consistency and allowing any air pockets to be released. This process prepares the clay for throwing or hand-building and helps me to understand the consistency better.
I was happy to find that this wild clay had quite a lot of elasticity and seemed it would hold together on its own. So no further clay substance was added. I could feel it might hold together to create a form & would be able to stay pure as the earth it came from. This was important to me as I was making this for sentimental reasons and wanted to keep the clay as true to the earth that I sourced it from.
Once the clay was ready. I took a small test piece to fire in the kiln & wrapped the rest of it up for later use. It's important to test new materials that come into the studio, especially when using unknown materials like wild clay.
I made a small pinch pot out of the clay & placed it in the kiln. I wasn't sure if it would melt entirely or if it would fall apart. As the kiln has variable firing temperatures for different clay bodies, depending on the quality of this clay it could liquify on my shelves or withstand high heat. For safety measures I fired the test piece on a piece of broken shelf, to ensure I didn't ruin my equipment if it were to melt. To my surprise, it came out a beautiful rich red tone, more vibrant than any clay I had used in my studio before. Very stable and solid, I was sure now that I could make something with this clay & fire it in my kiln.
The next steps were to decide what I wanted to make. Being that I have a really close family and have always loved my Aunties & Uncles, I felt this was a special project to be shared with them. It was important to me that each family member had something special to remember their parents by & something for me. With the small amount of clay that I had, I would need to make 6 tiny pots. One for each family & one for myself.

Here you can see how iron rich the clay is, so vibrant in colour. It was very gritty & hard to work with. Being that this clay isn't manufactured, it was very inconsistent. I knew it would be tricky to throw & much more suited to hand-building. But being that I work on the wheel, I wanted to challenge myself to push through and create some small relic like forms. Allowing them to be lumpy & misshapen, each taking on its own form.

Throwing each form with individual character, I create a series of pieces that would soon be dried, bisque fired & ready for their final firing. I decided against glazing these pieces, as it was the quality of the earth that I wanted to capture. Keeping the material as raw & undisturbed was important to me.
I created all final shapes, pressing rocks & bumps into their sides to accentuate their form. The final fired pieces were bold in colour, bright red and a-glow with iron. A beautiful gift to be wrapped up and sent out to each of my Oma's children. The clay itself is still quite porous once finished, this tells me that the clay could actually be fired to a higher temperature and may well be a high stoneware clay body. Being that I only fire to one temperature & was happy with the tones & finish of the clay, I decided to leave them this way. They are a little brittle and fragile. But being that they're a sentimental display piece, I think they are fine in the form that they are.

Thank you for reading. I know this is a longer form blog post than I usually write. But for those who were curious about this journey, I wanted to share in detail. And incase you're looking for a reference to explore wild clay, I hope this can be a helpful resource to others. It's time for me to pack up these pots & send them out to my family, Just in time for the Christmas holiday season.
I wish you all a Merry Christmas, may you cherish those around you and enjoy time with family and friends.
1 comment
absolutely beautiful from start to finish Kate. such a lovely tribute to your Oma.
Leave a comment